SSH is the default technology to connect to remote servers. Millions of servers can be reached via SSH. Everyone who has ever administrated a server with SSH exposed on the internet knows that there is a constant stream of login failures. Assuming the security of the SSH protocol and the correctnes of its implementation, this would be just a nuisance. However, software is hardly perfect, and even SSH is subject to security vulnerabilities. It is therefore advisable to use additional techniques to protect the SSH server. This article describes a solution that’s applicable for rented root servers where customers cannot add a hardware firewall or DMZ.
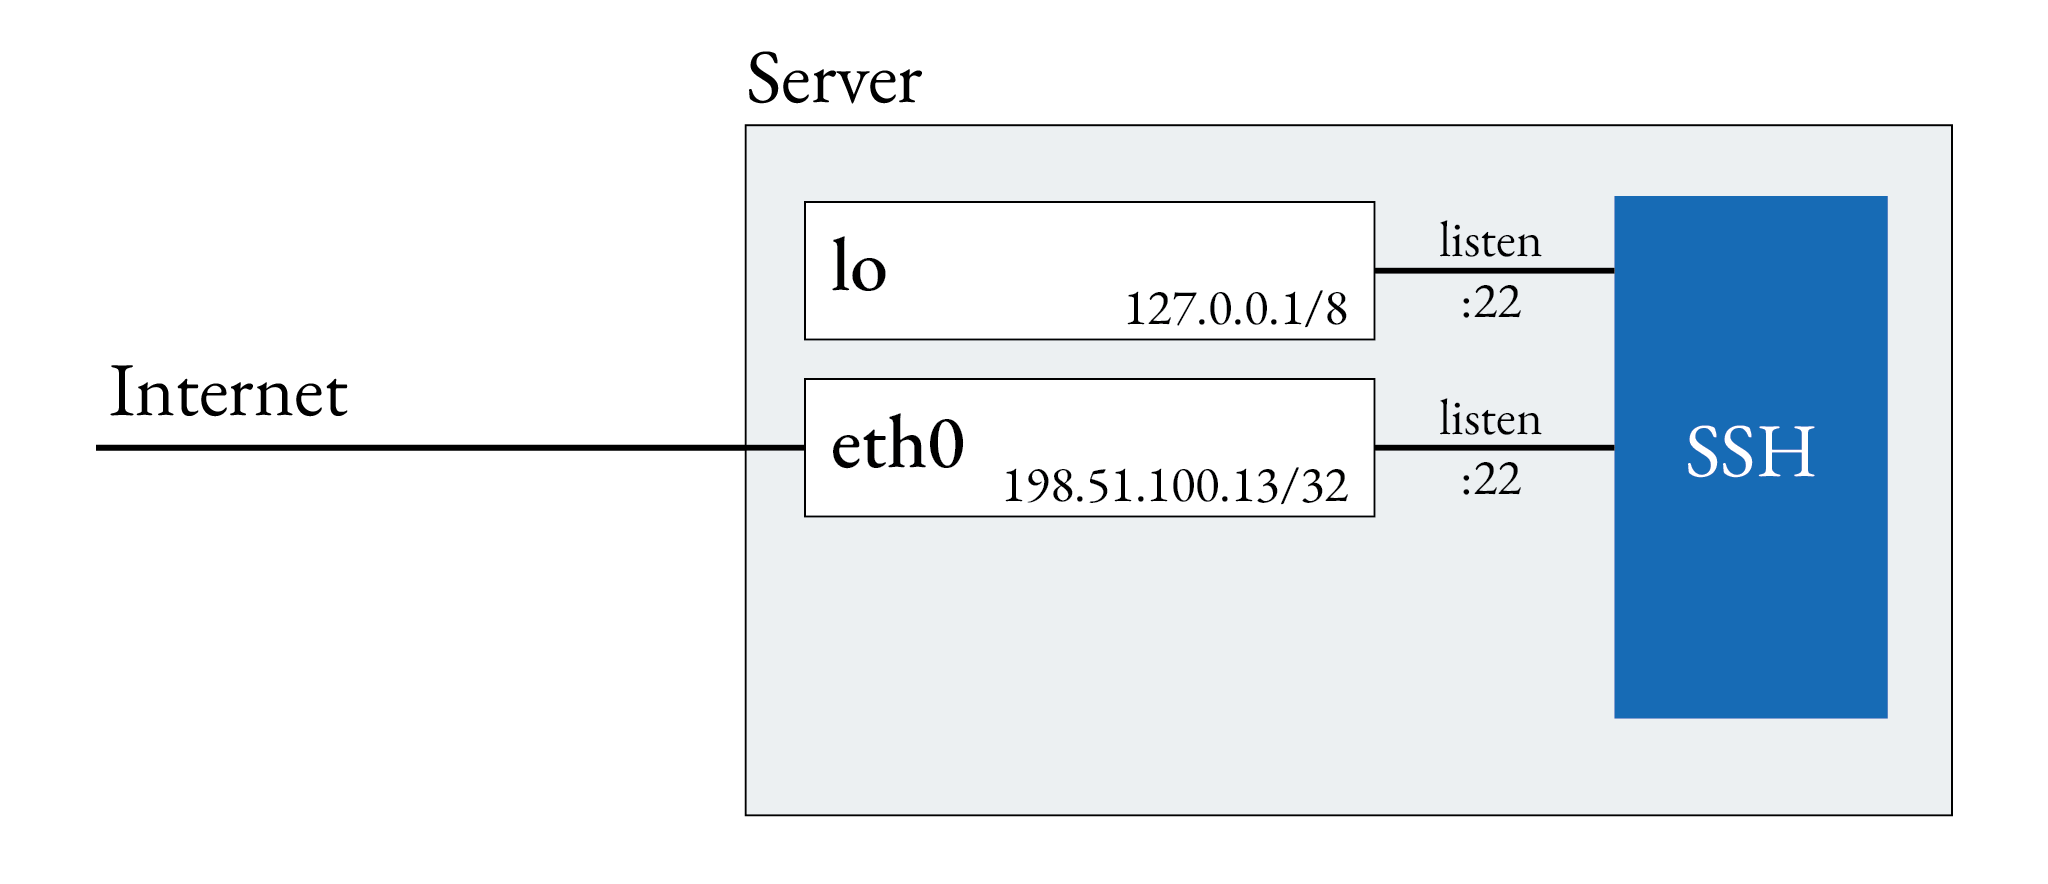
Assume an initial situation like this: A root server is exposed on the internet. The SSH service listens on
its public IP address and firewall is configured to allow traffic to port 22, however, I’ll not show
the firewall in this article.
The network interface eth0 uses the server’s public IP address 198.51.100.13.

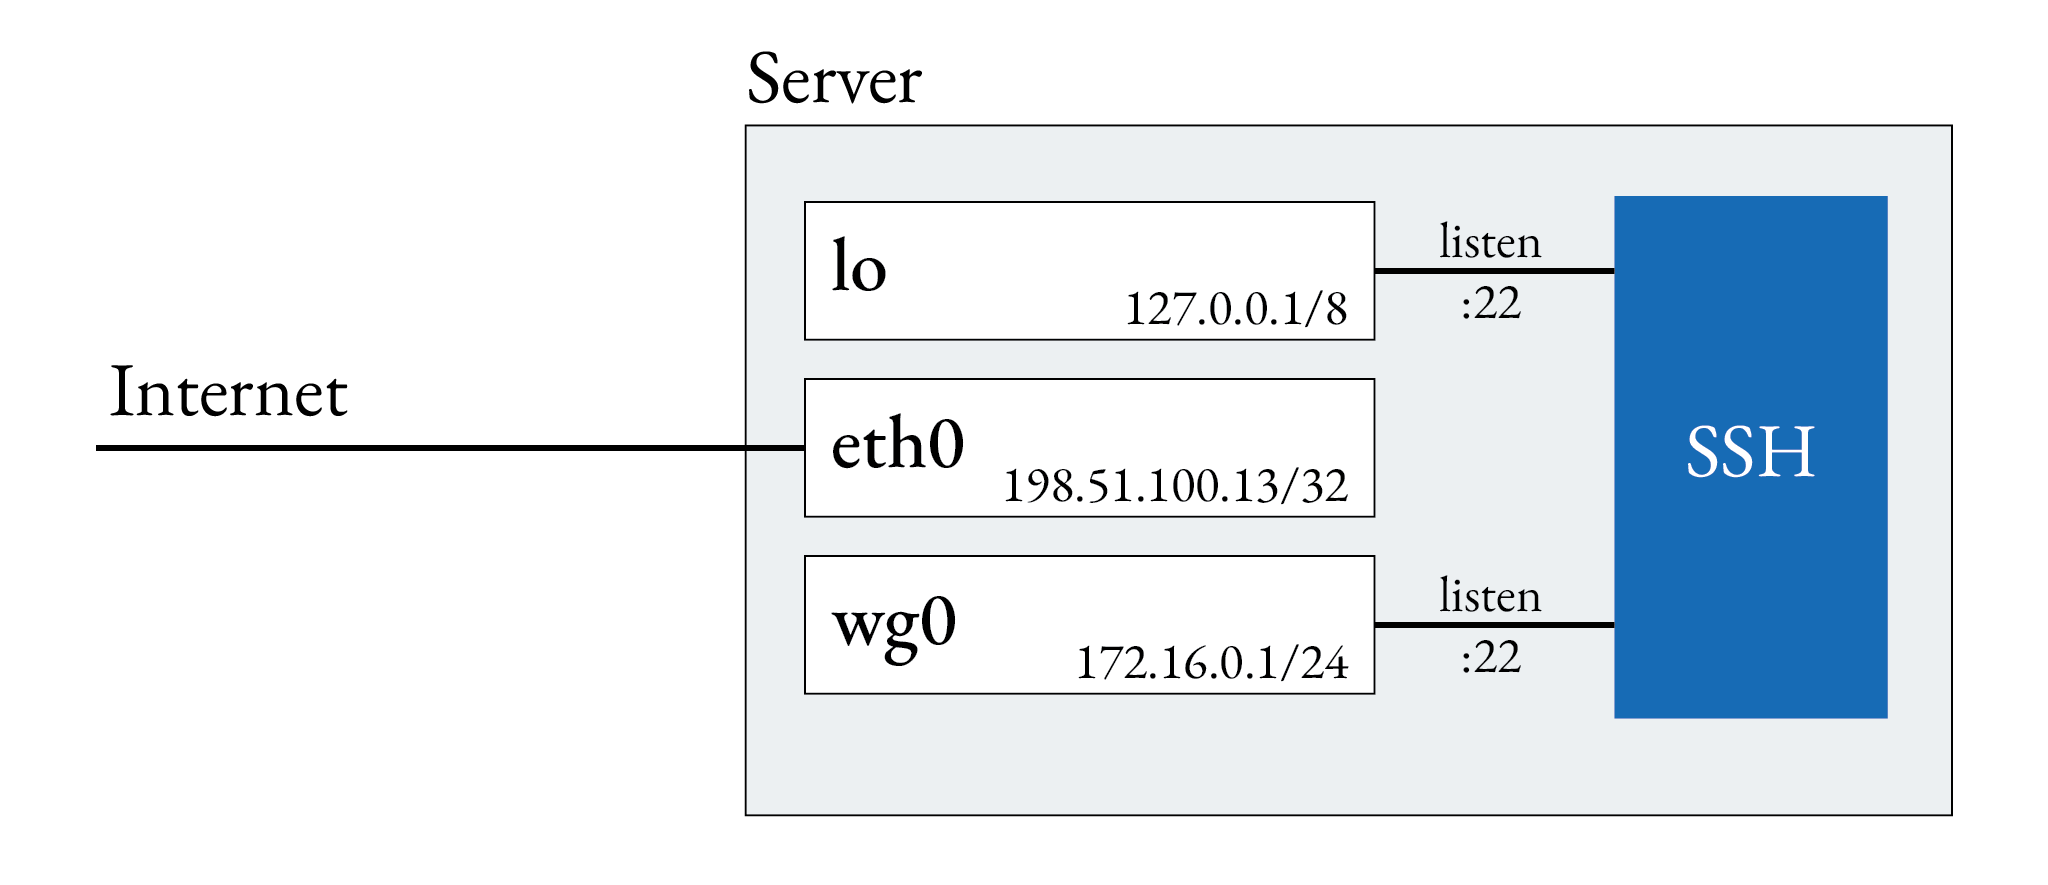
The goal of this article is to show how to arrive at a situation where SSH does
not listen on the server’s public IP
address. The firewall intercepts any request to 198.51.100.13:22. Remote access to the machine is only possible
by opening a secure tunnel with wireguard.

First set up wireguard. For this guide, I assume Debian 12 is your host system. The process can be easily adapted to the systems. Let’s start by installing wireguard and creating its network configuration.
$ apt install wireguard
Create private and public keys.
$ umask 077 && wg genkey > /etc/wireguard/privatekey
$ wg pubkey < /etc/wireguard/privatekey > /etc/wireguard/publickey
Create the wireguard configuration.
[Interface]
PrivateKey = PASTE HERE THE CONTENT OF /etc/wireguard/privatekey
ListenPort = 51820

[Peer]
PublicKey = PASTE HERE THE PUBLIC KEY OF YOUR CLIENT
AllowedIPs = 172.16.0.2
PersistentKeepalive = 15

# Add more clients if needed
Next, create the network interface.
# /etc/network/interfaces.d/wg0
auto wg0
iface wg0
	address 172.16.0.1/24
	pre-up ip link add wg0
	pre-up wg setconf wg0
	post-down ip link del wg0
And bring up the network interface.
# ifup wg0
If everything is fine, you should be able to see your new interface with $ wg.
Before changing the SSH configuration, ensure that the tunnel is configured properly and incoming connections are not blocked by the firewall. If the tunnel setup is incorrect, and you disable SSH for the public IP address, there is a danger of locking yourself out.
If the tunnel is set up correctly, let’s remove SSH from the public IP.
By default, there is no ListenAddress directive in SSH’s configuration files and SSH listens on all available
interfaces and addresses. By adding two explicit addresses, we disable listening on all other addresses,
including the public IP.
# /etc/ssh/sshd_config.d/listen.conf
ListenAddress 127.0.0.1
ListenAddress 172.16.0.1
Take a deep breath. After restarting the SSH daemon, the setup is complete.
# service sshd restart
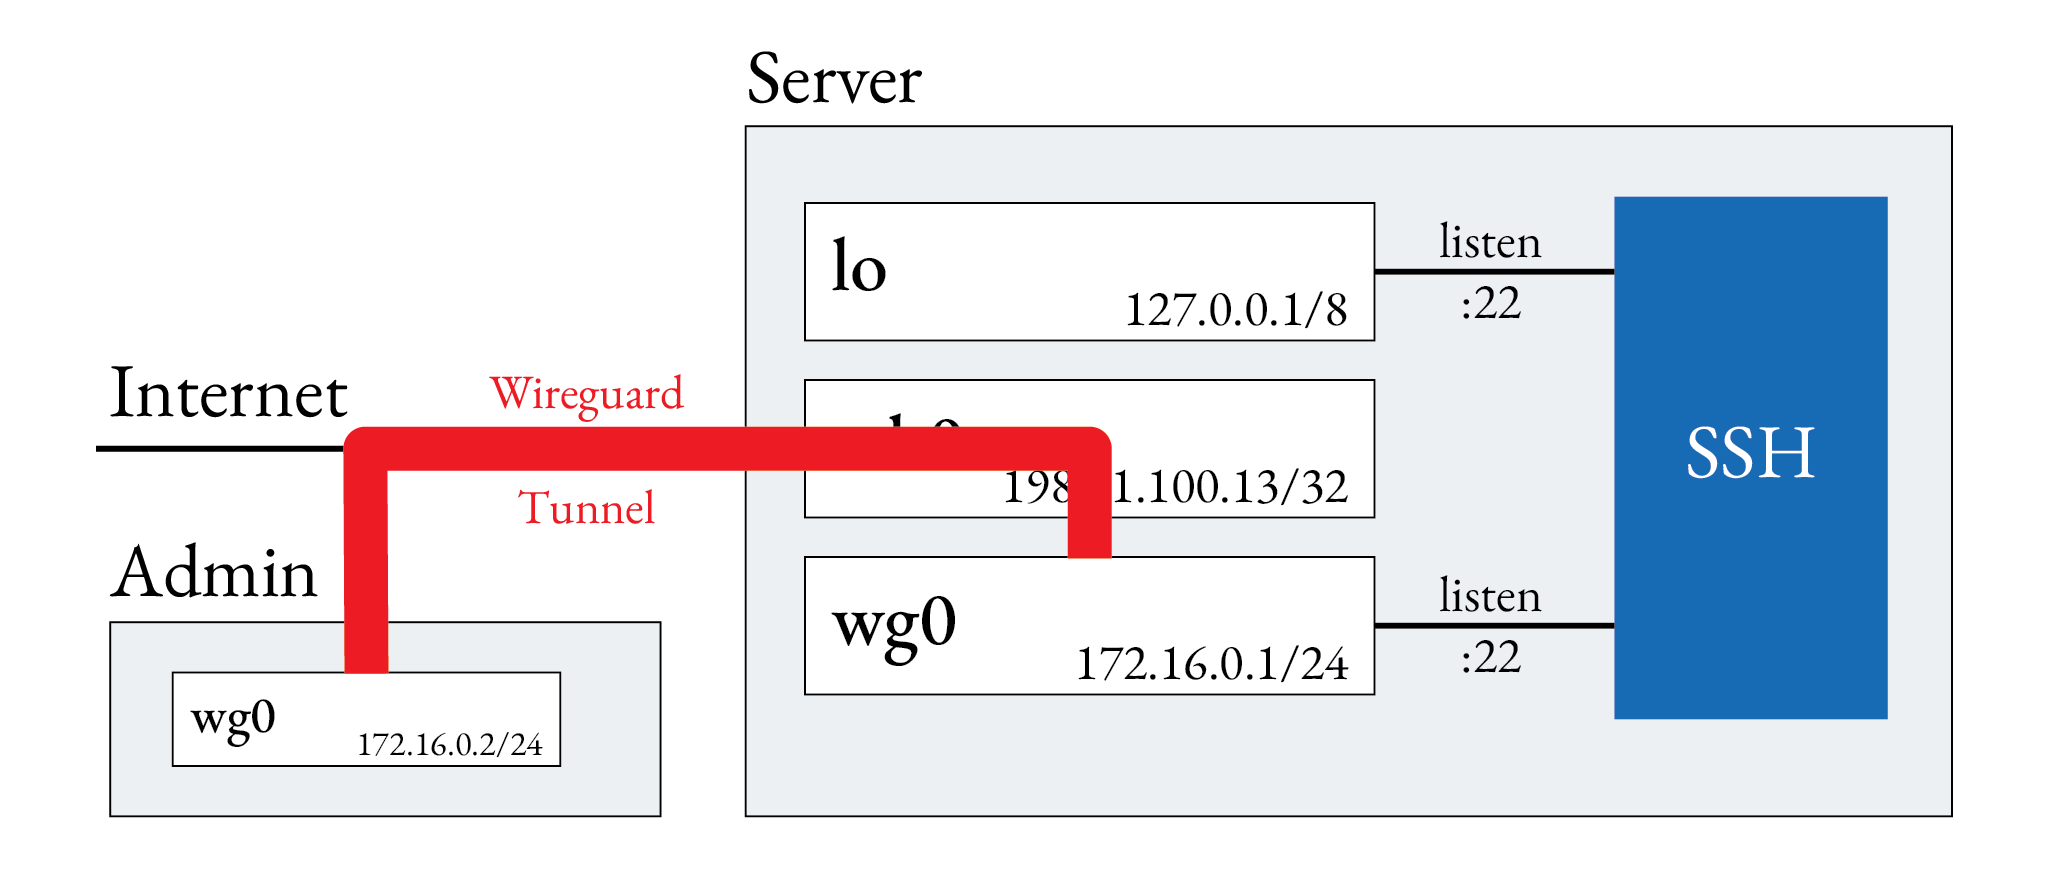
Now the only way to connect to the server is via wireguard tunnels as depicted in the following picture.

Bonus: Firewall
A suitable, minimal firewall configuration could look as follows. Please note, that this configuration does not include access to SSH via its public IP. Apply this configuration only after completing the above steps.
table inet filter {
	chain input {
		type filter hook input priority 0; policy drop;
		ct state invalid counter drop comment "early drop of invalid packets"
		ct state {established, related} counter accept comment "accept all connections related to connections made by us"
		iif lo accept comment "accept loopback"
		iif != lo ip daddr 127.0.0.1/8 counter drop comment "drop connections to loopback not coming from loopback"
		ip protocol icmp counter accept comment "accept all ICMP types"
		ip6 nexthdr icmpv6 counter accept comment "accept all ICMP types"
		udp dport 51280 counter accept comment "Accept wireguard"
		counter comment "count dropped packets"
	}
	chain forward {
		type filter hook forward priority 0; policy accept;
		counter comment "count forwarded packets"
	}
	chain output {
		type filter hook output priority 0; policy accept;
		counter comment "count accepted packets"
	}
}
This might also interest you
